There are nearly 3 billion users on social media. In a Facebook study, it was reported that up to 85% of people turn off their sound when watching social media videos. So in this blog post, we’ll show you how to create captions for TikTok to ensure you reach those silent viewers.
Now imagine if you could reach everyone on social media, but 85% of them were watching your video with the sound turned off. If they don’t understand your video because they can’t hear what you’re saying, they’ll happily skip it without thinking about it. However, if you have captions, people are less likely to skip them. If you don’t have captions, you’re theoretically missing out on 2.55 billion viewers.
So basically, long story short, not having captions on your video content is one of the worst moves you can make as a social media marketer in 2020.
Now let’s narrow this theory down, obviously, you can’t reach everyone on all social media platforms.
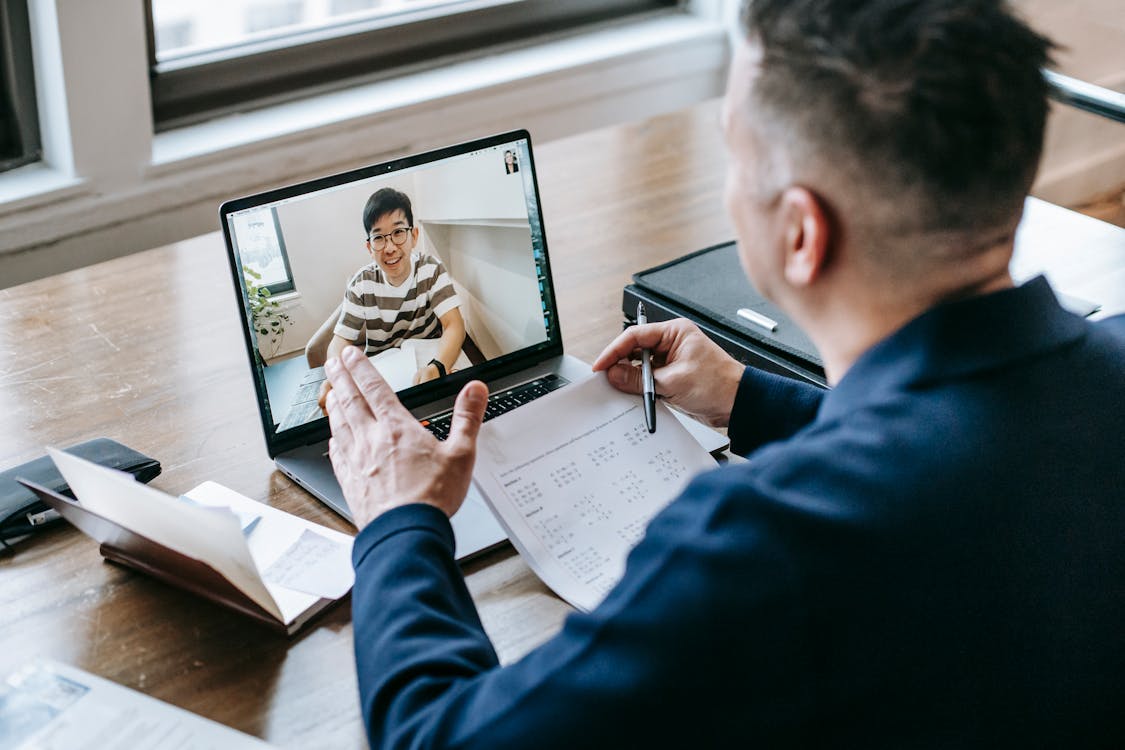
Focus on Tiktok
We’re going to focus on one platform, and we’re going to choose the top app in the UK right now, TikTok. TikTok has been growing at a phenomenal rate, and as of January 2020, it has amassed 400 million daily active users. So even if a small percentage of those 400 million daily active users were consuming a pure video content platform without sound, you’d still be missing out on a lot of potential viewers, fans, and customers.
And I’m not saying that all video content needs subtitles. But if you’re talking or explaining something in a video, captions for that video will help you reach thousands, if not millions, of people. If you know a little bit about TikTok’s algorithm, you should know that getting more people to watch your videos can only be good for you.
How to create subtitles for your TikTok content?
First of all, you can manually create all the subtitles yourself using TikTok’s text editor straight from within the app. You have different style options for the text with a choice between five fonts; Classic, Typewriter, Handwriting, Neon, and Serif. The alignment of the text; Left, Center, and Right. As well as dragging it to the position you want and pinching it to the size you like. Then there’s also color, for the actual text or the text labels.
While this is an easy way to do it because you can do it directly within the app and gives you plenty of creative freedom of choice, it is very time-consuming because you have to type out all the text yourself. Also, I have to say that the biggest downside to adding captions directly within TikTok is that you have to manually set the time for each sentence you write out. And doing this with your thumbs on a small screen is a bit of a nightmare.
Try AutoSubtitle Online to easy add subtitles to your TikTok video
#1 Upload your Tiktok video
Record and edit your TikTok as you normally would, saving the subtitles for last. Once you’re all done, head over to the Autosubtitle and upload your video.
Here, you can easily add subtitles to your TikToks. The reason I say easy is that once you upload your video to Autosubtitle, all you have to do is click on AutoCaption and it will automatically transcribe everything you say into text and place it at the right time throughout TikTok. So basically, TikTok subtitles.
#3 Customize your Tiktok Subtitles
Using Autosubtitle, just like on TikTok, you can actually customize these subtitles, including font, color, and placement. However, with Autosubtitle, you have more freedom in customizing your subtitles. And the best part is that you don’t have to do it sentence by sentence.
#4 Download your Tiktok video
Once you have placed and customized your subtitles. You can click upload, Autosubtitle will then render the video with your subtitles embedded. You can then take that video and upload it to TikTok with the subtitles.
Learning how to make educational videos accessible is a great way for teachers to engage their students. The video accessibility of these educational resources will ensure that those with disabilities can enjoy the same experiences as everyone else.
From children born with autism, ADHD or dyslexia, to adults looking for continuing education credits or workers who need a skills refresher after certification – video content offers opportunities that many other mediums cannot.
Educational video content can play an important role in personal growth; they enable learners of all ages to learn about old and new topics from a variety of perspectives. However, these videos are often difficult to access by learners with disabilities or other barriers that prevent them from using them as a learning resource.
This blog post discusses how to make educational videos accessible so that people with disabilities can access educational content on the same level as their peers.
The Importance of Video in Education
A video is worth a thousand words. And frankly, it does say more than any other medium, making it a great learning tool for parents and educators.
This is because the way information is shared in video content appeals to children and adults alike. It’s a way to learn things and teach life lessons. Video can be used by educators to teach and educate others in a variety of ways, not just by watching it in and of itself.
Helps the Disabilities
For people with disabilities, video content can serve as an important platform not only for education but also for socialization. It provides the opportunity to learn from different perspectives, allowing them to see what is being taught, not just read it.
Educational video content allows learners to process information in whatever way best suits them (e.g., auditory or visual). Thus, through video accessibility, they have more choice in how they wish to learn and process the information, which allows them to engage and retain the information.
In addition, video accessibility gives learners the opportunity to turn what might be perceived as a barrier into an opportunity, especially when open-mindedness and creativity are allowed into learning (i.e., immersion). This can only help to advance education and make the movement for accessible education for all widely available.
Ensuring that videos are accessible allows those who are unable to participate in real-life activities or classes due to disabilities, geographic barriers, etc. (e.g., students/workers who are on vacation or on a business trip) to benefit from the content anyway.
Recorded videos also enable them to learn at their own pace so that they can catch up later when unforeseen circumstances require them to leave work or school temporarily. Therefore, learning how to make educational videos accessible can help provide equal opportunities for peers and classmates, no matter what level they are at.
Decrease Education Cost & Expand Educated Group
Many institutions like colleges and universities use video in their educational programs because it piques students’ interest in studying a particular topic or subject.
Online education is also on the rise. There is no doubt how popular videos and tutorials based on focused teaching objectives can help pave the way for accessible education, as well as create engaging and digestible learning videos on a global scale.
Video accessibility is about inclusion
Accessibility means providing opportunities for people with disabilities so that they do not feel excluded because of physical, economic (i.e., lack of resources) or attitudinal (i.e., discrimination) barriers. Using video as a tool for accessible education allows people to learn at their own pace, without being limited by any of these barriers.
It is no wonder that many agencies such as the U.S. Department of Education (ED) have implemented online accessibility policies through guidelines and websites such as the Web Content Accessibility Guidelines (WCAG). And, because the video is accessible, it’s a way for them to reach a larger audience that can benefit from their resources.
Tips on How to Make Educational Videos Accessible
#1 subtitles
Adding video captions makes the video readable for everyone watching it. Captions convey what is being said in the video and make it easier for people to understand the message being conveyed.
It is important to use the best caption font for your video, with text that is large enough to scan and that appears on the screen long enough to give viewers time to read portions of the transcript.
Adding captions also help people who are learning how to read develop fundamental reading skills. Most educational videos already have subtitles or closed captioning included, but if there aren’t any, adding them yourself is very easy!
All you need is a subtitle generator that you can use for free or for a reasonable fee. Once that is done, you’ll learn how to make educational videos accessible to all who need them!
#2 Audio Description
Descriptive audio provides additional narration to video content so that people with visual impairments can understand what is being said. It can also help students who learn better through listening because it portrays in their minds how the narrator describes things.
Descriptive audio makes video content more engaging and exciting because they are no longer passive listeners, but active listeners.
Adding a descriptive narrator is as simple as hiring a narrator who will describe what is happening on the screen so that the viewer can better understand it. This may take up more time, but it will ensure that the video is accessible to everyone!
It is important to note that not all blind or visually impaired people use descriptive audio – if they do not, making educational video accessible to them requires making the video content available in other ways, such as using screen-reading software.
Examples of screen-reading software include JAWS, ZoomText, and WindowEyes, which read aloud or present information on the computer screen in different ways.
#3 Captions
Captions allow people with hearing impairments to read along with the video as they watch it. Subtitles convey the dialogue and other sounds in the video, making it easier for people to understand the content.
Creating educational content with captions is very easy. There are many tools and applications online that allow you to add captions to your videos, such as Autosubtitle Online.
This site offers affordable services to help spread accessible education by helping your learning videos reach their audience and make them easier to understand!
#4 Translation
The translation is the use of audio dubbing or text transcription to understand content in other languages. Adding a translator is easy – all you need to do is select a language that needs to be translated and then use a professional translation service to improve the accessibility of your video.
#5 Learn how to make educational videos accessible with an alternative text
Alternative text provides additional information when there is no voice in the video. Or when someone is narrating over an image or scene in the background, the alternative text helps supplement it
It can also provide more detailed information about the image to get a sense of how things look, even if they can’t see the picture. Adding alt-text is another easy way to make video accessible. This will help make educational accessibility of video formats easier as it will help to better understand the context of the video!
#6 Provide additional information to supplement the content in the video
Adding additional information is one of the best ways to ensure the accessibility of your videos. This is because it allows you to add links and more detailed information so that people can find out more about the things mentioned in the educational video.
It also provides a context when needed so that viewers have the necessary background knowledge before watching certain parts of the video. This is especially useful if the video covers something complex or covers several different topics.
This additional information is added through “annotations”. This is done by creating new text based on the existing voiceover or adding it elsewhere on the screen.
There are several ways to make this information easily accessible. One way is to make sure the annotations are visible for a certain amount of time so that the viewer has enough time to look at them; another way is to create a text description for each annotation
Adding annotations makes it easier for people to understand what is being said in the video and makes the annotations readable for people watching with closed captioning or subtitles.
#7 Make use of transcripts or sign language interpretation
Adding a transcript or a sign language interpreter allows you to make sure your content is accessible to everyone. It makes it easier for people to understand what is being said in the video at any given time, or how someone is describing the image they are seeing!
While the transcript is displayed below the video, the sign language translation can be added as captions at the bottom of the video or as text that is synchronized with the sign language clip.
If done correctly, then anyone who can’t hear the content can more easily understand your video by providing more information in the sign language clip!
Do you want to promote your social video engagement? Or have you ever regarded burning in subtitles to your social videos?
Burn in subtitles to YouTube videos online in 3 steps
Adding subtitles doesn’t only expand the global reach of your content, or allowing people from other countries who speak other languages can easily and better understand your video, but it can also help your audience to know if there are any type of audio issues and it’s not quite clear what’s being said.
But performing such a task is not so easy, right? Traditionally, yes – it’d require some sort of professional editing software, which could prove time-consuming, costly, and even sometimes dangerous if you didn’t download it from a trusted source.
However, things are much more straightforward now. You can burn your own subtitles into a video, online and for free. An Equipment which has internet and browser. Here goes!
First, open any browser and head over to YouTube. Finding any video you want to burn in subtitles. Then copy the URL.
copy the YouTube video URL
Next, open a new tab, search “AutoSubtitle Online”, click “Platform“(click and turn to Autosubtitle platform). Absolutely, you should have an account of Autosubtitle first. Sign in or sign up, then paste the video URL to the block below. And next is to click the button “Start”.
sign in and paste the URL
Only need to wait for a second, the YouTube video can be recognized by the Autosubtitle system.
recognize YouTube video URL
Burn in subtitles to Video
Hooray!!! Video is recognized successfully. The most essential part is coming.
Choose the transcription type: the normal quality or an advanced one.
Then CONFIRM the language spoken in the video.
Click the button “Next“, to begin the subtitles’ generation~~~
choose language and start auto subtitle
Only need several seconds, the subtitles can be generated well. Next, you should do is to correct the little error and proofread the subtitles.
Editing the subtitles
After you rectified the subtitles, you can change the subtitle style. You can change the subtitles’ font family, size, color… Also, you can change the video’s look, such as resolution and background.
change the style of subtitles
Save and Download the video
The last step, save your changes and export the videos. You can download the SRT files separately. And also you can download the video which is burned in subtitles.
Every day over 2 billion videos are streamed on YouTube. And 1.4 billion users are watching videos on Facebook. Videos become more and more influential which can easily attract the audience. Staying ahead of the game on streaming platforms by producing useful and attractive content is one of the most efficient ways for businesses to gain global exposure.
However, how could we improve the video content? Adding subtitles to videos is an excellent way to catch the eyes of more audience. Here are some of the benefits of subtitling, and how they help in expanding the reach of your content.
Benefits of subtitling a video
1. SEO Improvement
Adding subtitles to your YouTube content immediately flips the switch in your favor, as the YouTube algorithm ranks your videos higher in the search results when you have captions and subtitles in your videos since search engines are not capable of understanding the context of your videos without subtitles.
Benefits of subtitling-YouTube engine SEO
By accessing the embedded subtitles, search engines are able to understand what the video is all about. Thus, search engine can rank your videos by using the keywords of your videos so that to help you in reaching the proper audience.
2. Expanding your reach
One of the major benefits of subtitling is to help a wider audience access your content. For instance, subtitles make your videos easier for those who have trouble in hearing to enjoy your videos.
Within subtitles also means that the user has no need to know which original language you spoke in your videos, but they can understand and enjoy it by watching your videos subtitles. In order to reach more people, you could use bilingual subtitles to reach the international audience.
3. Enhanced viewing experience
The other benefits of subtitling to videos is to enhance the audience’s viewing experience. Subtitles has played a significant role in this way. When streaming videos during commuting or traveling, or in a bus or train, these public places need mute your mobile, so that you cannot listen to the audio of your video. However, subtitled videos can avoid the problem better.
4. Marketing yourself or brand
Subtitled videos can help companies and brands reach more international audience without producing separate content for different regions in different languages.
Adding subtitles is an economical way to gain a global customer base. For example, a mobile manufacturer in China can produce one instructional video on a product in Chinese. But can provide subtitling options in over 20 languages, which can help customers in other countries understand the content.
Another, for video blogger, like John Zhang, he spoke Chinese in his video, but he added English subtitles on the video for his both Chinese fans and international fans. If he did not add subtitles or captions on his videos, the non-Chinese speakers would not know him. This is also the benefits of subtitling a video.
Benefits of subtitling- global audience
Conclusion
In conclusion, we have explored a few out of the many benefits of subtitling to your video content. Thus, we can clearly understand that it has a relatively positive effect in helping your content reach a wider audience. Autosubtitle Online helps you to automatically generate subtitles for your videos online for free. Moreover, Autosubtitle Online provides more than 30+ languages’ free translation as well. Don’t miss us!
I am working as a website operation. In the past, I got the latest news and updates from the forum. Everyday reading takes me a lot of time. But since the growth of short video, I changed my way to get industry information. Also, I noticed that in some popular science and professional field, videos are always companied with subtitles. In that case, if you have a need in making videos, this article will tell you how to automatically create subtitles for your videos.
In order to add subtitles to your video automatically, you need to prepare:
Select video language (If you need translation, you can choose your target language. It’s free, too.)
Automatically generate subtitles
Edit your video and/or subtitles
Save and export your automatic subtitles or videos
Download your subtitles or videos
I want to share a Christmas video with my friends. But they are not English speakers. I need to add subtitles to my video so that they can understand me clearly. Here is an example, please follow me and get started with your automatic subtitle journey.
In order to create and add subtitles to your video, you will need to use a subtitle generator like AutoSubtitle Online. To use AutoSubtitle’s Subtitle Generator you will need to create an account. Please no worries, it’s free and AutoSubtitle offers a free trial for all new users.
2. Upload your video or paste your video’s URL
Once you have created your Autosubtitle account, click the Automatic button, and click the Upload button, browse your video files and upload it on the platform.
Or paste your video’s URL. AutoSubtitle Online can recognize the most popular video platforms’ URLs such as YouTube, Vimeo …
Upload your videos
3. Select video language for automatic subtitles
AutoSubtitle Online uses Artificial Intelligence to convert the audio of your video into subtitles. So it’s very important that you select the right source language for your video. This way, you will increase the quality of your automatically generated subtitles. As the audio to text conversion is provided by a machine, you may need to review and correct details and small errors in your subtitles.
Here, there are two versions for you to choose from. One is the Normal, and the other is the Enhanced. The enhanced version is much accurate than the Normal one. But the Normal one can also meet the basic requirement. And if you want to enlarge your audience, you can also click the Translation button. AutoSubtitle’s translation is totally free, no matter you are a free account or a paid account.
By the way, we advise you to click the email notice. After you clicked, the Autosubtitle Online system will send you an email after the subtitles have been generated.
4. Automatically add subtitlesto video
Once you have uploaded your video file and selected the right language, simply click on the button “Next“. It will take you a little while to fully convert your video into subtitles. If you have clicked the email sending notice at step 3, you can leave this page and do something else. After you receive the successfully generated email, you can get back to the “My Videos” page.
5. Edit your video and/or automatic subtitlesonline
After automatic subtitles have been generated. You can make some changes at the AutoSubtitle’s platform. You can change your video’s type, maybe it is for Ins stories, IGTV, Facebook, YouTube, TikTok, or Snapchat. AutoSubtitle Online has listed the video display sizes of the most popular social media. You can easily change it. You can correct the wording of your subtitles and change the timecode of each line to make them perfectly synced to your video. And also, you can edit the subtitles’ background, font color, font position, and font size.
6. Save and export your subtitles or videos
When you finish the adjustment, you need “Save” at first. And then you can “Export” your video. Please notice, you have to choose your video display size again when you export the video. Don’t forget to do it. If you want to backup the subtitles files, you can click the “Download subtitles” button.
7. Download your automatic subtitles or videos
Once you Save > Export, you just need to wait patiently for a few seconds or minutes, it depends on your video length. After Export successfully, you can check your video on the “Export” page. Finally, “Download” the video and upload it to your social platforms.
Tadaaaaaaaaa! Congrats! Good reputation and engagement!